To create content for the SODA LED Façade screen you should have the following core competencies:
- Have basic skills in After Effects CC 2019 or above
- Have an Adobe CC licence or have installed the free trial of After Effect available here and Adobe Media Encoder for rendering the video here
- Have basic video editing skills
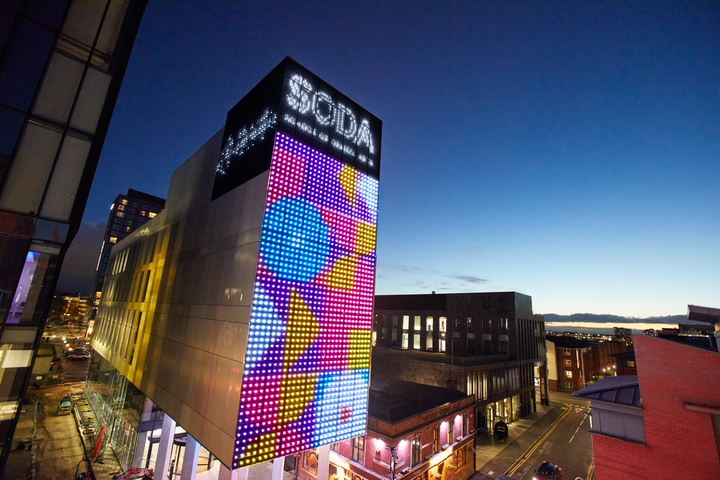
What is it?
The LED Façade is a large display on the SODA building, that covers the front, including the top, left and right side and the ceiling, going towards the entrance of the building.
The areas are divided into alphabetical sections A-F, where F is the foyer stairway. Note that from now on we will be using these references, and they form important elements when creating your content.
The core system consists of an array of LED lights. Each one has RGB and White properties and is covered in a diffusion dome. These are strung together in series, with 42 lines that run along each section
Lights are spaced 30cms apart on sections A, C, D, E, and F. In section B at the top, the lights are closer together at a distance of 10cm, resulting in a denser image. They represent individual pixels in each section that form a display. The display on every section apart from B is of a low resolution, illustrated below:
Pixel sizes for each section:
Section A – 318 x 283px
Section B – 314 x 196 px
Section C – 318 x 283 px
Section D – 318 x 652 px
Section E – 272 x 643
Section F – 537 x 189px
How is the image displayed?
In simple terms, the Façade system works not by matching the exact pixels of the video and then spacing them out to each light; instead it takes the content as one layer and places it over a light map, which depicts an accurate position of each light.
In order for the content to cover all of the sections accurately, only one video needs to be created in the same configuration as the light map. Since the sections are only a few hundred pixels in size the video needs only to be 1920 x 1080 pixels overall (HD format).
Whichever part of the video/image covers a light in the map, the physical light on the building shows that part of the image in points of colour.
To explain the concept further, imagine if the light map was inverted where the dots became transparent, making it into a stencil, and when that covers the video layer the video shines through each hole. Bear in mind this isn’t how it actually works, but it helps to think of this concept when producing your content.
Obviously doing something like this would be time consuming, with you trying to get the position right rather than doing the nice creative stuff.
So we created an easier way by using Adobe After Effects, where a template was designed for content creators that mirrors the exact position of the sections.
You can drop and scale in a video into each composition on the template (labelled Section A-F) and then render the whole template out as a HD video. Note that each composition must be 30 seconds long, which is the recommended length for the whole video. Any content added that’s shorter than this length will result in the video disappearing in that section. Select the **Preview composition** to preview your work and get an impression of what it could look like. When you are satisfied with the sequence select the *Soda Default Render* composition.
We then recommend that you render the file out using Adobe Media Encoder by selecting the *Soda Default Render* composition and going to File>Render>Export>Add to Adobe Media Encoder Queue. All the settings for the video file format should be already configured so you would just need to change the name and location to your preference.
Please find the link to download this template at the end of this blog. We recommend that you continue reading through this before downloading.
What type of content should be created?
- Content should be no more than 30 seconds long
- Large shapes and bold graphics work, so patterns and animated shapes look great
- 8-bit retro images work
- Fine lines don’t work
- Text generally doesn’t look great. If you must use it, consider using very bold text, nothing fine like Serif or calligraphic text. It is slightly better and clearer on section B but again, bold and contrasted is best.
Can I submit anything?
The short answer is no. To put in plain simple terms, we have a huge screen on the side of a building that people can see as far as the Beetham Tower and high vantage points to the north of Manchester. When a creator puts content up, that person making a statement on the University’s building. So any content must not :
- Contain any material which is obscene, offensive, hateful or inflammatory.
- Promote overtly sexually explicit material.
- Promote discrimination based on race, sex, religion, nationality, disability, sexual orientation or age.
- Infringe any copyright, database right or trade mark of any other person.
- Promote any illegal activity.
- Give the impression that it is endorsed by Manchester Metropolitan University.
- Be threatening, abusive or invades another’s privacy, or causes annoyance, inconvenience or needles anxiety.
- Be likely to harass, upset, embarrass, alarm or annoy any other person.
Furthermore any content that, displays factual information, should be accurate and true.
What format do I send?
Initially, you would produce a short snippet, screenshot or thumbnail version of what you’ve created and post it on your Instagram page. A date for nominations will be announced and if you are nominated, you will then be asked to send your full video.
If you have used the AE template, the settings below would already be there when you render out your video. However, if you prefer to use something else, (which is not recommended) your file format settings should be as below:
| File Format | MP4 |
| Video Encoder | H264 |
| Pixel Size | 1920 x 1080 |
| Aspect Ratio | 16:9 |
| Bitrate | 5Mbs |
| Framerate | 24FPS |
Download template
Click the link below for the template files and then select ‘Download’ – this will download everything in a .zip file.
Right click on the zip file and select ‘extract all’ to a location on your hard drive.
Please make sure you keep the files in the folders to allow the templates to work as directed in the guides.